Scrubbing your feet can feel productive: a few minutes in the shower, a gritty pumice, a satisfying rinse. But if you’re dealing with thick, stubborn patches, a callus peel is often the turning point because it tackles the removal of dead skin in a different way, at a different depth. It matters because calluses aren’t just “dryness” - they’re your skin’s armour, and armour doesn’t shift because you had a go at it with a scrub.
Most people discover this after the same loop: scrub, moisturise, socks, repeat, and still the heels catch on bedsheets. The problem isn’t effort. It’s method.
Why scrubs keep you stuck on the surface
Scrubs are built for polishing, not shedding. The grains and friction knock off loose flakes, smooth the top layer, and make your feet feel better for a day or two. But thick callus is compacted keratin - tightly packed cells that have been reinforced by pressure and repetition.
That’s why your results plateau. You can scrub harder, but the skin responds like skin does: it protects itself. Overdoing abrasion can trigger more thickening, or leave micro‑tears that sting, crack, or inflame.
Think of it like trying to thin a wooden plank with sandpaper. You’ll change the feel, not the structure, unless you spend forever - and even then, you risk rough edges.
What a callus peel does differently (and why it works)
A callus peel doesn’t rely on force. It uses keratolytic ingredients (commonly acids such as lactic, glycolic, or salicylic) to loosen the “glue” holding dead, hardened cells together. Instead of grinding the top, it softens and separates the built-up layer so it can lift away over time.
That change matters because callus isn’t only on the surface you can see. The thickness is layered, and the uncomfortable bit is often the dense middle where pressure has compacted everything. A peel reaches into that structure in a controlled way, which is why it can succeed where scrubs just shine the outer shell.
A scrub makes the surface smoother. A peel changes how the dead layer is attached.
You’ll often notice it in the days after: edges look less raised, cracks stop “catching”, and the skin feels more flexible - not just temporarily slick.
The real reason calluses form (and why your routine has to match)
Callus is a feedback loop: pressure and friction tell your skin to build. That’s why the same spots return - heels, the ball of the foot, the outer edge, the big toe. If you only polish the top, you’re treating the symptom, not the architecture your body created to cope with your shoes, your gait, your job, your training.
A callus peel works best when you pair it with a pressure plan. Otherwise, you’ll get a great peel… then rebuild the same armour in the same place.
Here’s the practical mindset shift: soften, lift, then protect. Not scrub, strip, repeat.
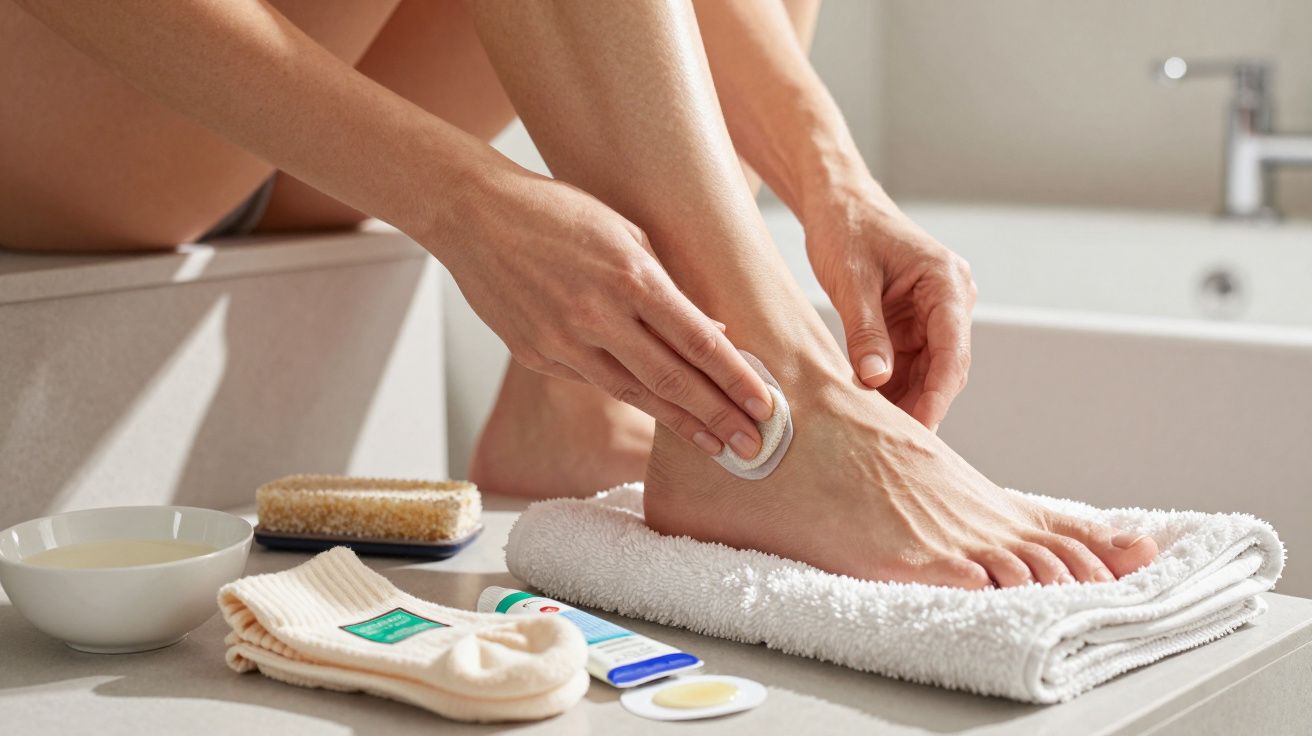
How to use a callus peel without turning it into a drama
Most problems come from rushing or stacking too many “active” steps at once. Follow the product directions precisely - peels are designed to be specific, not improvised.
A sensible, low‑risk approach looks like this:
- Start on clean, dry feet, and avoid broken skin, fissures that are bleeding, or active eczema.
- Apply only to thickened areas, not your whole foot “because why not”.
- Do not extend the processing time. More minutes isn’t more results; it’s more irritation.
- After the peel phase, let the skin shed gradually. Don’t rip or pick at lifting skin.
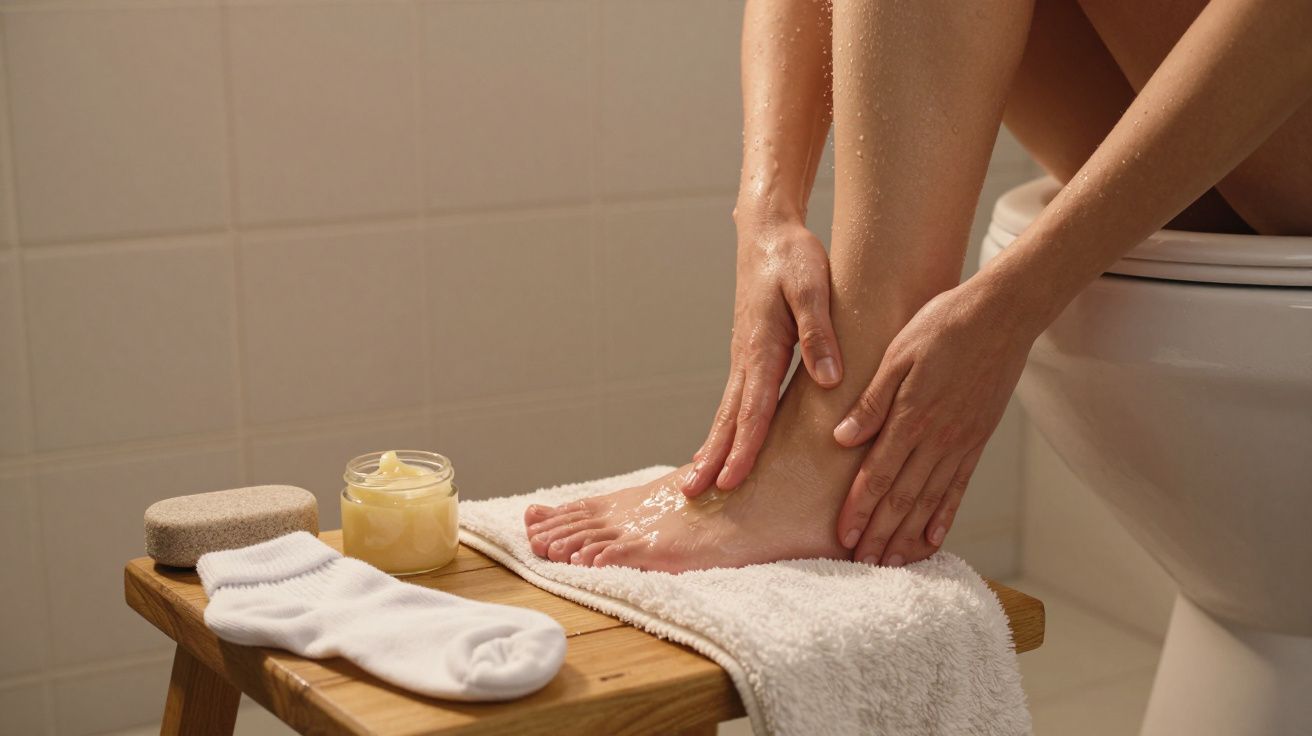
- Moisturise daily afterwards, ideally with a urea-based foot cream to keep the softened layer from compacting again.
Let’s be honest: the temptation is to “help” it along. That’s where people get sore. If the peel has done its job, the dead skin will come away when it’s ready - in the bath, with gentle rubbing, or as it naturally sloughs.
Scrub vs peel: what each is actually for
Sometimes the best routine uses both, but in different roles.
| Tool | Best for | When it disappoints |
|---|---|---|
| Scrub/pumice | Quick smoothing, maintenance | Thick, stubborn callus; cracks; rapid re-build |
| Callus peel | Breaking up dense build-up | Misuse, overuse, or using on compromised skin |
If you’ve been scrubbing weekly for months and the same patch is still raised, that’s your sign you’re in “maintenance mode” without ever doing the reset step.
Make the results last (the part most people skip)
The peel is the reset. The footwear and aftercare are what stop the reset from disappearing in two weeks.
A small checklist that actually changes outcomes:
- Switch to shoes with a bit more cushioning under the heel and forefoot if you’re on hard floors.
- Consider insoles if you always wear through the same edge of a sole (a quiet clue about pressure).
- Keep a simple nightly habit: moisturiser, then cotton socks for 20 minutes while you scroll.
- Use a gentle file once the skin is soft - not to remove “more”, but to keep edges from re‑thickening.
You don’t need perfection. You need the callus to stop getting the same signal every day.
FAQ:
- Is a callus peel painful? It shouldn’t be. Tingling can happen, but burning, sharp stinging, or redness that spreads are signs to stop and rinse thoroughly.
- Can I use a peel if I have cracked heels? Avoid using it on open or bleeding cracks. If you have deep fissures, diabetes, poor circulation, or neuropathy, speak to a podiatrist before using at-home acids.
- How often should I do it? Follow the product guidance. Most people do better with occasional “reset” use and then maintenance moisturising, rather than frequent peeling.
- Do I still need to scrub afterwards? Not aggressively. Once shedding starts, gentle rubbing in the bath can help, but picking and hard filing can cause soreness and rebound thickening.
- Why does the callus come back? Because pressure and friction are still there. Treat the build-up and the cause - shoes, insoles, and consistent moisturising are what make results stick.


Comments (0)
No comments yet. Be the first to comment!
Leave a Comment